
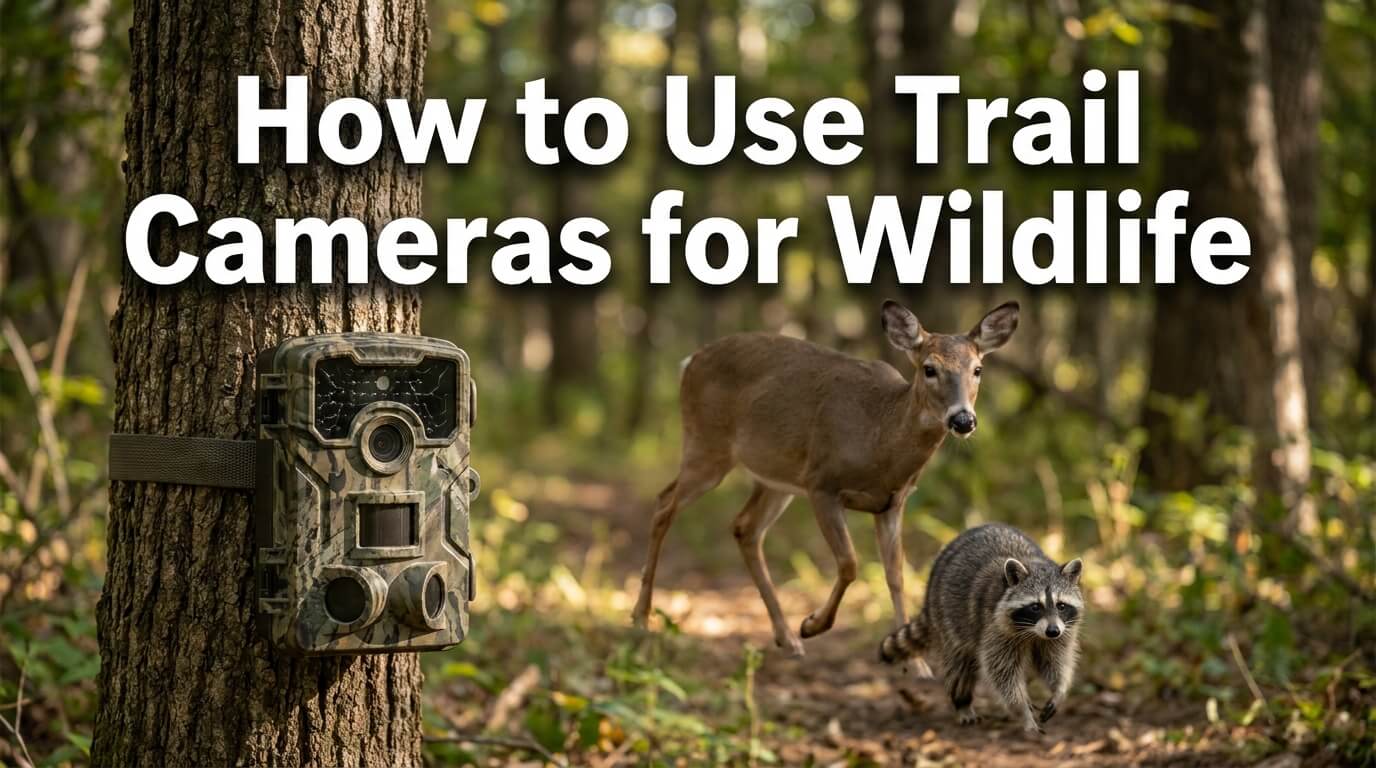
A trail camera can reveal which animals cross a yard, visit a creek edge, move along a fence, or investigate a garden after dark. The most useful setup is not the one with the most expensive camera. It is the one placed at the right height and angle, aimed at a real travel route, configured for the expected animal, and checked without repeatedly disturbing the site.
Learning how to use trail cameras for wildlife also means learning what the footage cannot prove. One dark, blurry frame may show that an animal passed the sensor, but it may not show the species, true body size, direction of travel, or whether the visit was unusual. Better results come from combining photographs or video with time stamps, repeated movement patterns, nearby tracks, feeding signs, holes, and other evidence.
Remote cameras can allow observation without catching or handling animals. National Park Service field guidance describes motion-triggered cameras as tools that can record presence, activity patterns, habitat use, and behavior with relatively little disturbance when they are installed responsibly. The same guidance stresses secure mounting, minimal disruption, and care with flashes or sensor lights around sensitive species. See the National Park Service remote-camera guidance for the research standard behind that principle.
Quick Answer

Start by deciding what question the camera should answer. Are you trying to learn what is digging in a lawn, which animal is entering beneath a deck, when deer use a trail, or whether a suspected raccoon route is active? Then place the camera along a naturally used path, aim it across rather than directly down the route when possible, clear only the vegetation that would constantly trigger the sensor, and test the frame before leaving.
For many medium-sized backyard mammals, a camera mounted around knee height is a practical starting point, but there is no universal best height. A squirrel on a fence, a fox on a path, a turkey in a field, and a mouse near a woodpile occupy very different parts of the frame. Set the lens roughly level with the animal’s body, then adjust for slope, target size, and distance.
- Use a stable strap or mount that does not damage the tree or structure.
- Aim away from sunrise and sunset when direct glare may wash out images.
- Use time stamps so you can compare visits by hour and date.
- Choose photo, video, or a combined mode based on the question you are asking.
- Do not place a camera where checking it requires approaching an active nest, den, roost, or resting animal.
- Confirm that you have permission and that unattended cameras are allowed at that location.
Why Trail Cameras Are Useful for Wildlife Clues
Confirming animals without close contact
Tracks and other field signs are often incomplete. Dry ground may hold no print at all, while rain can enlarge a footprint and make its edges look unlike the original foot. A camera can add another kind of evidence without requiring a person to wait beside the site. This is especially helpful for animals that are active at night or retreat when people are nearby.
The camera should replace close pursuit, not become a reason to enter sensitive spaces more often. If an animal changes direction, freezes repeatedly, investigates the device for a long time, or stops using a route after installation, reconsider the position, lights, sound, and checking schedule. Ethical wildlife observation puts the animal’s normal activity ahead of the desire for a dramatic image. The U.S. Fish and Wildlife Service guidance on wildlife photography ethics emphasizes minimizing negative effects on both wildlife and habitat.
Understanding timing and behavior
A time stamp can answer questions that a footprint cannot. It may show that squirrels are visiting during daylight, that raccoons arrive several hours after dark, or that a deer trail is used mostly near dawn. A sequence can also show whether the animal was traveling, feeding, scent marking, carrying nesting material, following young, or simply passing through.
Repeated records are more informative than a single appearance. A fox recorded once in six weeks may have crossed the property during a wider movement. A skunk seen on several nights near the same shallow lawn divots may provide stronger evidence about the digging. Even then, footage shows use of the camera’s narrow viewing area, not the animal’s total home range or population size.
Supporting tracks, droppings, holes, and feeding signs
Place the camera because the site already suggests activity, not merely because it looks wild. A line of prints beside a fence, a worn opening under vegetation, repeated digging near grubs, seed shells below a tree, or mud marks on a deck support can point to a productive angle. The goal is to watch the route leading to the clue rather than aim so tightly at the clue that the animal moves outside the frame.
Camera evidence can also prevent an incorrect first guess. A hole under a shed might be used by a skunk even if another animal started it. A trash spill may be blamed on a raccoon when the sequence shows a loose lid opening in wind and squirrels arriving later. One method checks the other.
Choosing a Trail Camera Setup Without Overcomplicating It
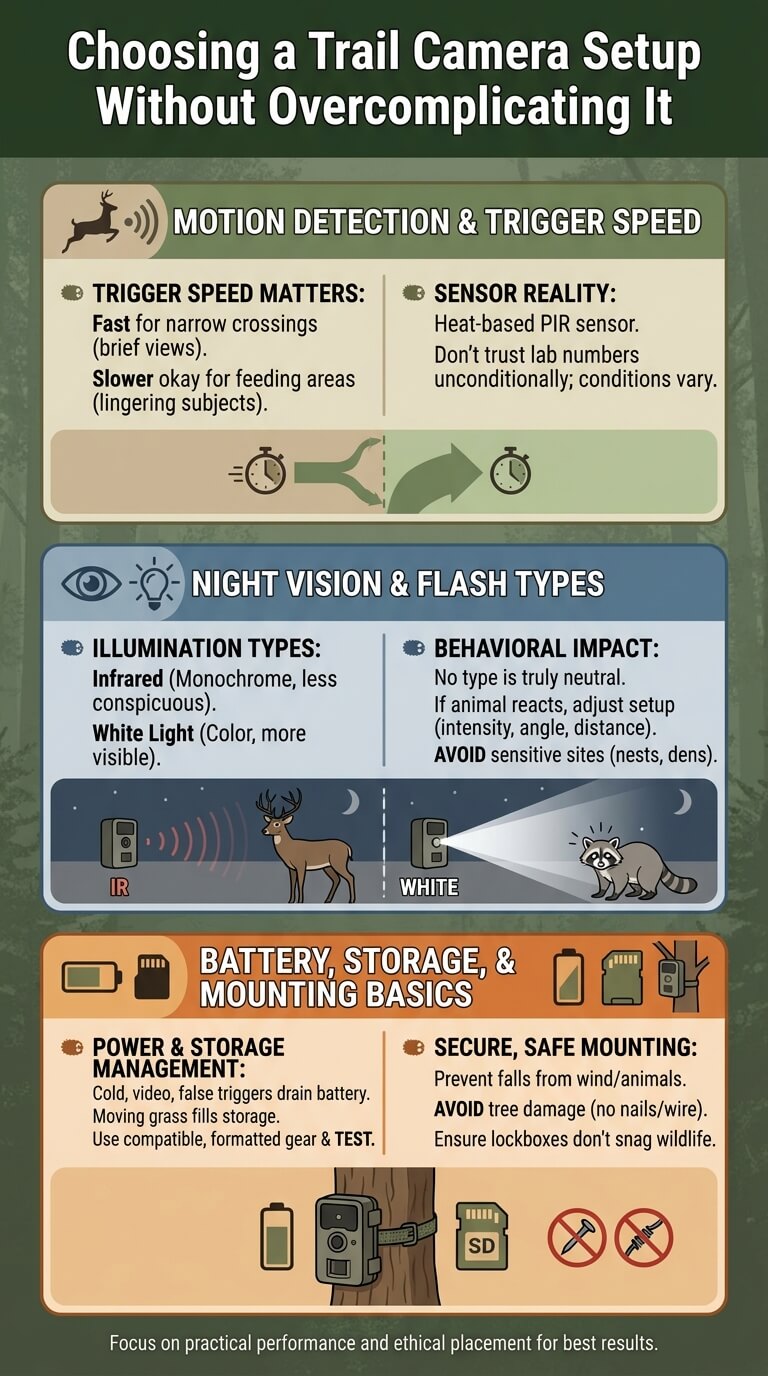
Motion detection and trigger speed
Most consumer trail cameras use a passive infrared sensor that responds to changes in heat moving across its detection area. That is why warm leaves, sunlit branches, or heated surfaces moving in wind can sometimes create empty frames. It is also why a small animal far from the sensor may pass unnoticed.
Trigger speed describes how quickly the camera begins recording after detection. A faster response is useful along a narrow crossing where an animal may remain in view only briefly. A slower camera can still work at a feeding area or broad trail where the subject lingers, provided the setup does not use food to alter behavior. Do not treat a manufacturer’s laboratory number as a guarantee in every temperature, angle, or battery condition.
Night vision and flash types
Night cameras commonly use infrared illumination, while some models use visible white light. Infrared images are often monochrome and may lose fine color details. White light can provide color but is more conspicuous. No illumination type should be assumed to be invisible or behaviorally neutral for every species.
If the camera repeatedly captures an animal staring directly at it, approaching the light, avoiding the area, or reacting at every trigger, change the setup. Reduce the intensity if the model allows it, increase distance, change the angle, or switch illumination modes. Do not use a startling flash beside an active nest, den entrance, bat roost, or other sensitive resting site.
Battery, storage, weatherproofing, and mounting basics
Cold temperatures, repeated night illumination, long video clips, cellular transmission, and frequent false triggers can shorten battery life. Storage fills quickly when moving grass creates hundreds of files. Before deployment, use compatible batteries and memory cards, format the card as the manufacturer recommends, set the correct date and time, and run a short test.
Mount the unit so wind, rain, curious animals, or a loosening strap will not make it fall. Avoid nails, screws, wire, or other attachments that damage trees unless the property manager specifically permits an appropriate installation. A locking box may protect a camera from theft or chewing, but it should not create a sharp edge, loop, or gap that could snag wildlife.
Where to Place a Trail Camera for Wildlife

Game trails, fence gaps, water edges, and feeding routes
Look for repeated travel lines: compressed vegetation, a narrow opening beneath a fence, a muddy bank with overlapping prints, or a route that connects cover with water. Aim across the line of travel at a slight angle. An animal moving across the sensor’s field usually creates a clearer sequence than one walking straight toward the lens and remaining small until the final moment.
Scientists use remote cameras to study where wildlife appears and how habitat use changes over time. A National Park Service monitoring program at Saguaro National Park explains that camera records can help evaluate habitat use, while also noting that photos provide imperfect information about whether a species uses a broader area. That limitation applies to backyard interpretation too. The Saguaro wildlife-monitoring report is a useful example of careful interpretation.
Backyard locations such as gardens, trash areas, decks, and tree lines
In a yard, begin with the route an animal is likely to take rather than the object it visited. A camera aimed at the ground beside an unsecured trash can may show only legs or a nose. Move it farther back so the frame includes the approach, the container, and a reference object that helps estimate scale.
For a deck or shed, watch the entrance from outside rather than pointing deep into a cavity. That gives a better chance of seeing the entire animal and reduces disturbance. Do not seal the opening until you know whether it is active and whether dependent young could be inside. A licensed wildlife professional can help when an animal is living in a structure.
Places to avoid because they disturb animals or people
Do not install a camera close to an active bird nest merely to obtain chick or feeding footage. Adult birds may respond differently by species and stage of nesting, and repeated human visits can expose the location to predators or cause disturbance. The same caution applies to dens, roosts, maternity sites, bedding areas, and narrow passages where animals cannot easily move around the equipment.
Avoid aiming at a neighbor’s yard, windows, patio, doorway, public restroom, campsite, playground, or heavily used trail. Even when the intended subject is wildlife, people may be recorded. Limit the frame to your property or an authorized study area, disable audio when it is unnecessary or restricted, and delete incidental human footage responsibly.
Public-land rules differ by location and may address unattended equipment, resource protection, commercial activity, seasons, identification tags, or permits. General permission to take handheld photographs does not necessarily authorize leaving a device attached to a tree. National Park Service rules also require photography activities to avoid adverse impacts and direct visitors to contact the individual park when requirements are unclear. Check the current National Park Service photography guidance and the rules for the exact property before installing anything.
Camera Settings That Help Identify Animals

Photo versus video mode
Still photographs use less storage and may preserve a sharper moment for comparing ear shape, tail form, markings, or foot placement. A burst of two or three frames can show direction and reduce the chance that the only image contains half an animal. Video captures gait, posture, interactions, vocal behavior when audio is enabled, and the sequence of digging or climbing.
Choose the format based on the unknown. If you are separating a domestic cat from a bobcat-like silhouette, several clear stills may help with tail and body proportions. If you are deciding whether an animal is digging, scent marking, or carrying food, a short video may reveal more. A combined mode is useful when storage and battery life allow it.
Time stamps and burst settings
Correct time and date settings turn files into a pattern. They let you compare visits with sunrise, human activity, trash pickup, irrigation, weather, or pet access. Check the clock after battery changes and daylight-saving transitions. A wrong year or hour can make a normal sequence appear mysterious.
Height, angle, distance, and scale references
Camera height should match the center of the expected animal’s body, not the observer’s eye level. Angle the camera parallel to the ground on a level route. If it points downward from high on a tree, nearby animals may look unusually large while distant animals disappear into the background. On a slope, use a wedge or adjustable mount so the sensor covers the path rather than the soil immediately below.
Distance affects both identification and illumination. Too close can crop the head or tail and overexpose a pale animal at night. Too far can turn a fox, cat, or raccoon into a few bright pixels. Place a harmless fixed reference such as a fence post, marked stake on private property, or known-width path within the scene. Do not leave loose measuring objects where they could be swallowed or carried away.
After mounting, take a test image with a person or neutral object at the expected crossing point. The person should not approach or imitate wildlife at an active den or nest. Check that the frame includes the full body area, the horizon is level enough for comparison, and vegetation will not block the lower half of the subject.
Reading Trail Camera Evidence Correctly
Use behavior, time, size, and movement together
Identification should come from a combination of features. Body outline, ear position, tail length, leg proportions, gait, coat pattern, and movement style may all help. Habitat and local range matter too. A species that is not known from the region is a less likely explanation than a common animal distorted by angle or motion blur.
Time of day can support an interpretation, but it does not prove it. Raccoons and skunks are often active at night, yet either may appear during daylight for ordinary reasons. Squirrels are usually associated with daytime activity, but a flying squirrel may appear after dark. Avoid turning a schedule into a diagnosis or a rigid rule. For backyard footage, the signs of raccoons, squirrels, and skunks can help explain differences in timing, gait, damage, and den use.
Size is easiest to judge when the animal passes the same point as a known object. Perspective can make an ordinary house cat appear larger than a coyote farther from the lens. Wide-angle lenses exaggerate subjects near the edges and foreground. Compare several frames and, if safe, measure the route after the animal is gone.
Why night footage can mislead size and color
Infrared night images often remove color, flatten shadows, and create bright eyeshine. Dust, rain, fog, insects, spider silk, and moisture close to the lens can reflect illumination and produce glowing shapes. A tail moving during a long exposure may seem thin, split, or absent. A white patch can become an overexposed area with no detail.
Do not identify a rare animal from eyeshine color alone. Apparent eye color depends on camera settings, angle, distance, retinal reflection, and image processing. Similarly, a black-and-white night image cannot reliably separate two species whose key difference is subtle coat color.
When tracks or droppings help confirm the footage
After reviewing the camera, look for evidence at a safe distance without handling it. A clear five-toed raccoon print, a line of squirrel gnawing, or repeated shallow skunk foraging holes may support what the camera recorded. Fresh tracks in mud can show where to adjust the frame for the next deployment.
Droppings require more caution. Do not pick them up to compare size or contents, and do not allow children or pets near an accumulation. Photograph from a distance if needed. When droppings are in a home, attic, play area, or repeated latrine, use public-health or professional cleanup guidance rather than treating them as a casual identification object.
Trail Camera Ethics, Safety, and Privacy

Do not bait or feed wildlife casually
Food can increase detections, but it can also change what the camera is measuring. An animal visiting a natural trail is using the area on its own. An animal visiting food placed for a photograph is responding to a human-created attractant. Feeding may concentrate animals, draw predators or unwanted species, change movement, increase conflict near homes, and violate local rules.
The U.S. Fish and Wildlife Service notes that teaching wild animals to associate people with handouts can create risks and alter normal behavior. Even bird feeding can concentrate animals and bring disease, predation, and collision concerns when it is managed poorly. Its discussion of the risks and responsibilities of feeding wildlife explains why bait should not be the default tool for backyard camera use.
Research projects sometimes use bait or scent under controlled protocols, but that does not make the practice appropriate for every homeowner or species. Never bait large predators, alligators, bears, coyotes, venomous snakes, or other animals in a way that brings them closer to people, pets, roads, or homes.
Avoid active nests, dens, and sensitive habitats
Remote observation is only low-impact when placement and maintenance are low-impact. Do not cut a new path to a nest, move cover from a burrow entrance, shift rocks beside a reptile shelter, or trample wetland vegetation to improve the view. Use an existing observation point and accept that some locations should not be filmed. Camera placement near nesting areas should follow bird nest identification and observation practices that minimize disturbance.
Respect property, people, and local rules
Install cameras only on property you own or where the owner or manager has given permission. Mark equipment as required, keep contact information with it when appropriate, and remove it by the deadline. Some jurisdictions restrict camera use for hunting, transmitting images, baiting, or placement on public land, so a rule that applies in one state may not apply in another.
Privacy deserves the same planning as wildlife identification. Aim low and tight enough to exclude neighboring homes and common pedestrian routes. Consider whether audio is needed. Restrict access to cloud accounts and memory cards, because footage may reveal when people are away, where children play, or how a property is entered.
If the camera records suspected illegal activity, an injured animal, or a person in danger, preserve the original file and contact the appropriate authority rather than posting identifying footage publicly. For ordinary accidental recordings, delete them and reposition the camera.
Common Mistakes and Myths
Placing cameras too high or too far away
A camera mounted at adult chest height may work for deer but miss rabbits, skunks, and opossums. A camera set far from a narrow gap may capture the entire landscape while producing an animal too small to identify. Correct the geometry before buying a new unit.
Lower the camera, move it closer, and aim across the route. Then test both daylight and night exposure. Keep enough space to avoid cropping. The best framing usually includes the animal’s full body, several steps of travel, and one stable scale reference.
Assuming one blurry image proves a rare species
Trail camera photographs are vulnerable to motion blur, compression, infrared effects, partial views, and forced perspective. Common animals can look unfamiliar when only the hindquarters, tail, or reflected eyes are visible. A rare identification needs multiple consistent features, regional plausibility, and preferably more than one record.
Share uncertain images with a state wildlife agency, university extension office, museum, or recognized identification community while keeping the exact location private for sensitive species. Describe what is visible without leading with a dramatic conclusion. “Medium-sized mammal with a long tail recorded at 2:10 a.m.” is more useful than “mystery cougar” when the image does not show diagnostic features.
Using bait in ways that change animal behavior
A baited camera may produce more photographs but worse information about natural movement. Repeated food can cause the same individuals to return, so fifty images do not represent fifty animals. It may also bring species together that would normally remain separated in time or space.
Remove the food attractant rather than escalating it when footage is poor. Improve placement with tracks, paths, gaps, water approaches, rubs, chew marks, and other existing signs. Patience preserves the meaning of the observation.
Using Wildlife Signs to Improve Camera Placement
Tracks, droppings, and holes as placement clues
A line of tracks tells you where the feet went, which may be more useful than the place where the animal paused. Set the camera a short distance along that route so the body crosses the frame. Droppings can indicate repeated use, but stay back from accumulations and do not place equipment where checking it exposes you to dust or contamination.
For a dug hole, film the approach and surrounding ground rather than pointing directly into the opening. That may show whether the visitor is the animal that created the hole, an animal using an abandoned burrow, or a predator investigating it. Do not insert a camera into a den or block the entrance.
Raccoons, squirrels, skunks, birds, and other backyard visitors
Raccoons often travel along edges, water routes, fences, and access points near decks or trash. A medium-low camera placed far enough back to include the full body can show the hand-like front feet and ringed tail when conditions are clear. Squirrels require a higher or more vertical setup when they move along trunks, branches, roofs, or fence rails.
Skunks are best recorded from a low side angle along a lawn edge, foundation, or gap beneath a structure. Give the animal space and do not create a narrow approach that brings it close to a doorway or pet run. Birds at ground level may trigger a standard sensor, but small birds moving quickly through branches may require a closer frame or a different observation method.
Keep pets indoors or supervised while testing suspected wildlife routes. Do not allow a dog to investigate a camera site where raccoons, skunks, coyotes, or other animals repeatedly appear. The camera should help reduce surprise encounters, not create one.
FAQ
What is the best height for a trail camera?
There is no single best height for every animal. Mount the lens near the expected center of the target animal’s body and adjust for slope and distance. Around knee height is a reasonable starting point for many medium-sized mammals on level ground. Use a lower position for rabbits, skunks, or small mammals, and a higher or upward-facing position for animals moving on trunks, branches, fences, or roofs.
Test the frame before deployment. The full animal should fit in the image at the crossing point, with enough surrounding space to show movement and one object of known size.
Can trail cameras scare wildlife?
They can affect some animals, especially when installation introduces human scent, noise, visible light, sensor glow, unfamiliar shapes, or repeated visits. Reactions vary among species and individuals. Some animals ignore a device, some investigate it, and some may avoid it.
Use a secure, quiet setup; avoid bright flashes near sensitive sites; reduce checking frequency; and move or remove the camera if footage suggests repeated alarm or avoidance. A camera is useful only when the information gained does not come at an unnecessary cost to the animal.
Should you use bait with a wildlife trail camera?
For ordinary backyard observation, it is usually better to use natural travel routes and existing signs instead of bait. Food changes the reason animals visit, may attract unwanted species, can increase conflict, and may be restricted by local rules. It can also make repeated images look like greater animal activity than would occur naturally.
Specialized research or management projects may use approved lures or bait under defined protocols. That is different from feeding wildlife for entertainment or social-media footage. When in doubt, ask the state wildlife agency or property manager before placing any attractant.
Final Thoughts
Knowing how to use trail cameras for wildlife begins with a clear question and a respectful setup. Follow real travel signs, place the lens at the animal’s level, aim across the route, test the frame, and use time stamps and repeated sequences instead of trusting one dramatic image. Read footage alongside tracks, digging, chew marks, droppings, and habitat, while accepting that some identifications should remain uncertain.
The camera should reduce disturbance and close contact. Do not bait animals casually, crowd nests or dens, record people unnecessarily, damage trees, or leave equipment where local rules prohibit it. A carefully placed camera can turn a vague nighttime clue into a useful picture of when and how wildlife uses a space, without requiring the animal to change its behavior for the observer.

Ethan Walker is the founder and research editor of Animal Fact Central. He creates and reviews educational animal facts content using trusted wildlife, pet care, and science-based sources. His work focuses on making animal behavior, adaptations, habitats, and species facts clear, accurate, and engaging for everyday readers.
Read More Details About Ethan Walker: https://animalfactcentral.com/ethan-walker/